gradebook
Create custom fields for your
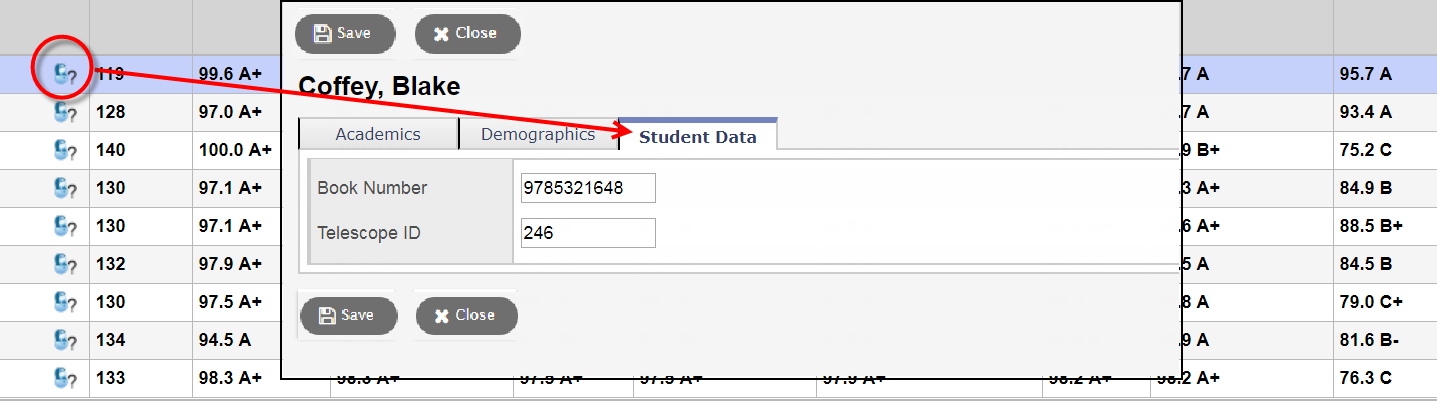
| Example: You want to track the book number of each student's textbook. Create a custom field called Book Number, and then enter that value for each student. |
After you create the fields and enter values, you can view this information on your Scores page. To do so, click the Student Information icon ![]() in the Name column. On the pop-up, click the Student Data tab.
in the Name column. On the pop-up, click the Student Data tab.
| Note: Your system administrator must enable custom fields on the Gradebook Student Information system table before you begin. |
To create custom fields for your
- Log on to the Staff view.
- Click the
- Click Set preferences under your username, and then click the
- Clear the gear icon
 , and then click the Student Information tab.
- From the
Note: If you do not see the Enable student data field, contact your system administrator. The system administrator must enable custom fields on the Gradebook Student Information system table for this field to appear.
- Now you can name the custom fields. From the
- Click Options > Configure Student Data Tab. The Student Field Configuration pop-up appears. In this example, the teacher can create four custom fields.
-
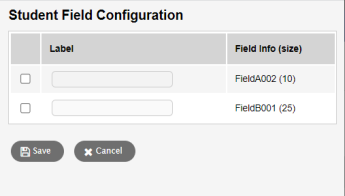
- Select a checkbox, and then enter the Label for this field. The Label is the name that appears on the Student Data Tab on your Scores page. The Field info (size) column shows the field's maximum number of characters. Consider how many characters you will need when you enter data for this field.
Example: You want to create a field for your student's nicknames. Since nicknames tend to be short, select the checkbox in a row that allows for 10 (10) characters, and then enter Nickname in the Label field.
- On the pop-up, repeat step 6 to create each custom field. Click Save.
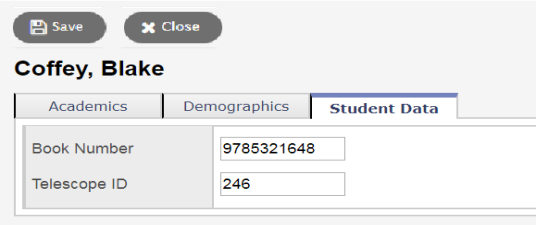
- Now enter values for the custom fields. Go to the Scores page for this course section, and then click the Student Information icon
 in the Name column.
 - Click the Student Data tab, and enter information for each field you created.
-
- Click Save.
- To create custom fields for another course section, repeat steps 4-10.
Note: Create custom fields for each course section as needed. If you created a Nickname field for Algebra I section 001, it is only available for students in that section. Repeat the steps for your students in Algebra I section 002.